Instead of generating a random name during OSD deployment, you might want to enter a custom name to your computers. This is very easy to do with a PowerShell script now that WinPE 4.0 and later support PowerShell. The method do have some requirements though, which are:
- You will need to have MDT 2012 Integration in your SCCM Server. The Script will use ServiceUI.exe which is part of MDT. You will need to copy the binary with same architecture as your boot image.
- Your boot image must support the use of Microsoft .NET (WinPE-NetFx) & Windows PowerShell (WinPE-PowerShell). So you will need to create a custom boot image, instead of using the original ones.
Next step is to create the script. Lets name it
OSDComputerNamePrompt.ps1 The script itself looks like this:
function Load-Form { $Form.Controls.Add($TBComputerName) $Form.Controls.Add($GBComputerName) $Form.Controls.Add($ButtonOK) $Form.Add_Shown({$Form.Activate()}) $Form.ShowDialog() } function Set-OSDComputerName { $ErrorProvider.Clear() if ($TBComputerName.Text.Length -eq 0) { $ErrorProvider.SetError($GBComputerName, "Please enter a Computer name") } else { if ($TBComputerName.Text.Length -gt 15) { $ErrorProvider.SetError($GBComputerName, "Computer name cannot be more than 15 characters") } else { $OSDComputerName = $TBComputerName.Text.Replace("","").Replace(":","").Replace(";","").Replace("|","").Replace("=","").Replace("+"," ").Replace("*","").Replace("?","").Replace("<","").Replace(">","").Replace("/","").Replace("\","").Replace(",","") $TSEnv = New-Object -COMObject Microsoft.SMS.TSEnvironment $TSEnv.Value("OSDComputerName") = "$($OSDComputerName)" $Form.Close() } } } ::LoadWithPartialName("System.Drawing") ::LoadWithPartialName("System.Windows.Forms") $Global:ErrorProvider = New-Object System.Windows.Forms.ErrorProvider $Form = New-Object System.Windows.Forms.Form $Form.Size = New-Object System.Drawing.Size(285,140) $Form.MinimumSize = New-Object System.Drawing.Size(285,140) $Form.MaximumSize = New-Object System.Drawing.Size(285,140) $Form.StartPosition = "CenterScreen" $Form.SizeGripStyle = "Hide" $Form.Text = "Enter Computer Name" $Form.ControlBox = $false $Form.TopMost = $true $TBComputerName = New-Object System.Windows.Forms.TextBox $TBComputerName.Location = New-Object System.Drawing.Size(25,30) $TBComputerName.Size = New-Object System.Drawing.Size(215,50) $TBComputerName.TabIndex = "1" $GBComputerName = New-Object System.Windows.Forms.GroupBox $GBComputerName.Location = New-Object System.Drawing.Size(20,10) $GBComputerName.Size = New-Object System.Drawing.Size(225,50) $GBComputerName.Text = "Computer name:" $ButtonOK = New-Object System.Windows.Forms.Button $ButtonOK.Location = New-Object System.Drawing.Size(195,70) $ButtonOK.Size = New-Object System.Drawing.Size(50,20) $ButtonOK.Text = "OK" $ButtonOK.TabIndex = "2" $ButtonOK.Add_Click({Set-OSDComputerName}) Load-Form You can download the script from
HERE Next step is to obtain the ServiceUI.exe, the binary can be found in these locations, depending of the architecture:
C:\Program Files\Microsoft Deployment Toolkit\Templates\Distribution\Tools\x64 C:\Program Files\Microsoft Deployment Toolkit\Templates\Distribution\Tools\x86 Next thing to do, is to create a package to your SCCM. No need to add any programs. To implement the script in your task sequence, you will need to place the package between the "Partition Disk" and "Apply Operating System" steps.
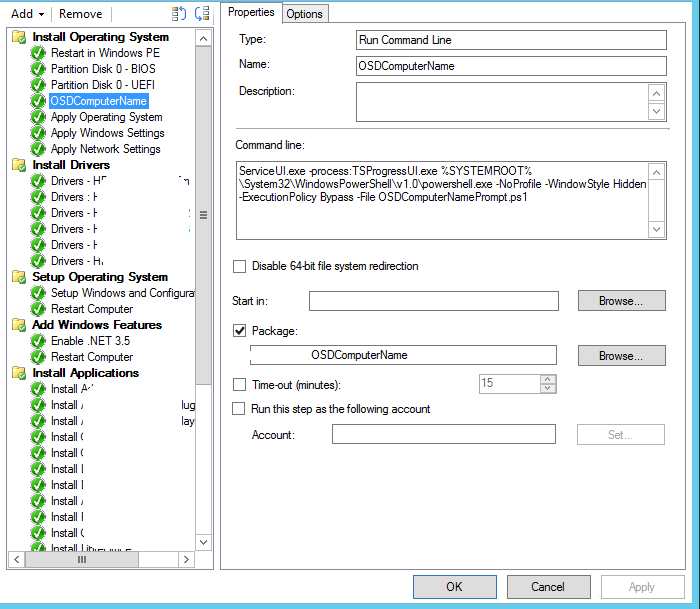
The command itself is:
ServiceUI.exe -process:TSProgressUI.exe %SYSTEMROOT% \System32\WindowsPowerShell\v1.0\powershell.exe -NoProfile -WindowStyle Hidden -ExecutionPolicy Bypass -File OSDComputerNamePrompt.ps1
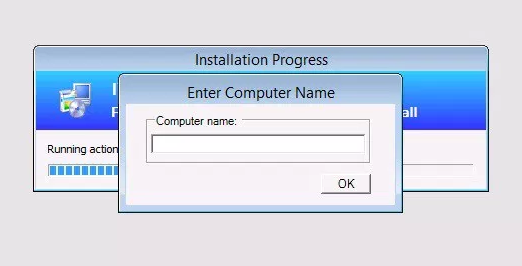
During installation, the Computername prompt will look like this:
All the credits for this great script goes to Microsoft MVP
Nickolaj Andersen
