Do's and don'ts concerning security for Identity part 5

Continuing with the do’s of Identity and supposing that you are in part of your journey that you have either Hybrid or fully cloud-based identities.
In the last part I covered how you can keep your External users in bay with Dynamic groups and access reviews.
In this part we will see how to protect your High-privileged users and give them permissions they need and for the time you want them to have them.
First you could create your own roles
The is a good collection of predefined roles for Azure AD and Azure resources but sometimes it could be a viable solution to create your own roles from scratch.
What's the difference?
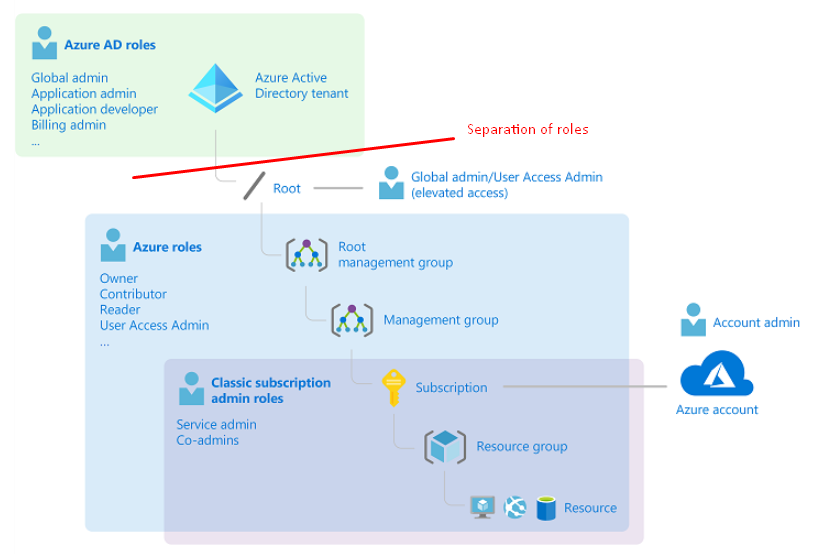
Fundamentally, Azure AD roles are admins for users and services (M365) and should be separated from Azure Resource roles although they can be added to Azure Resource roles.
Azure AD roles = Identity in Azure AD and admin roles for M365 based services.
Azure Resource roles = Services inside Azure and their defined roles.
Here is a picture from Microsoft, how the roles differ from the other.
Why to create your own roles?
Like said, Microsoft have a comprehensive set of Azure AD based roles.
Azure AD built-in roles - Azure Active Directory - Microsoft Entra
But what if you need strictly to define your own roles and the exact permissions for it? Let's based on a regulation in our industry policies.
Currently there is 174 permissions to choose from, I will list them here for reference as I didn't find anywhere else.
How?
Azure AD roles
Easiest way is to GET a new role with Graph and modify the permissions, then POST the role back with
GET https://graph.microsoft.com/v1.0/roleManagement/directory/roleDefinitions
Paste it back to Graph and select POST (Note that
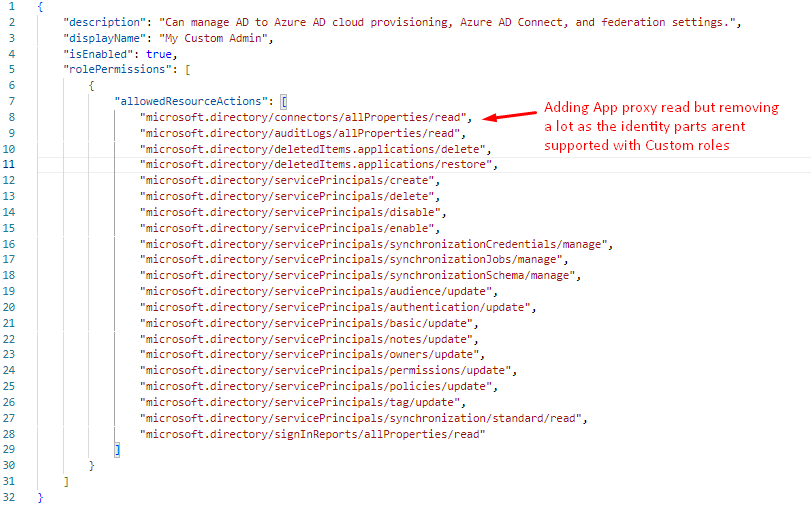
Consent the permission to Write and Read roles.

Note that if you are trying to create a roles with an permissions that isn't allowed, you will get this.

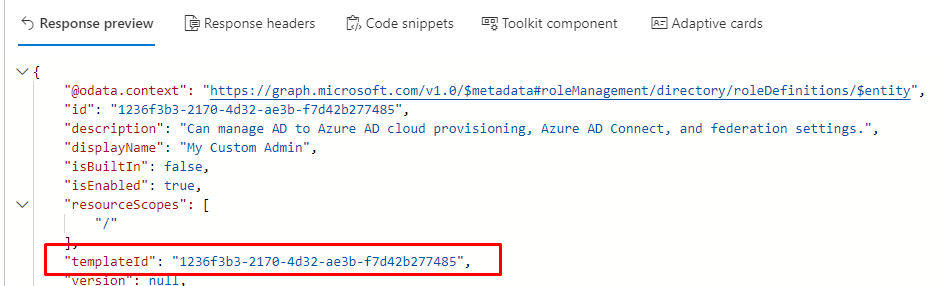
After the role is successfully created, you will get a template ID that you can use in new custom roles.
Inside the portal you will it this way

Azure resources
But for Azure resource roles the story is totally different. You can still use JSON files to create the roles but you have ability to Clone the existing Built-in roles.
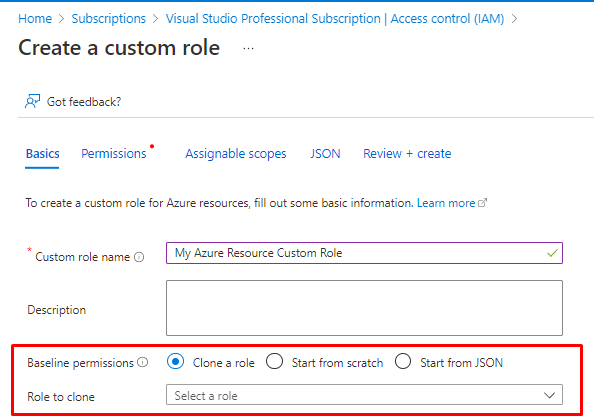
If we choose Key Vault Administrator for cloning, we will see the following.
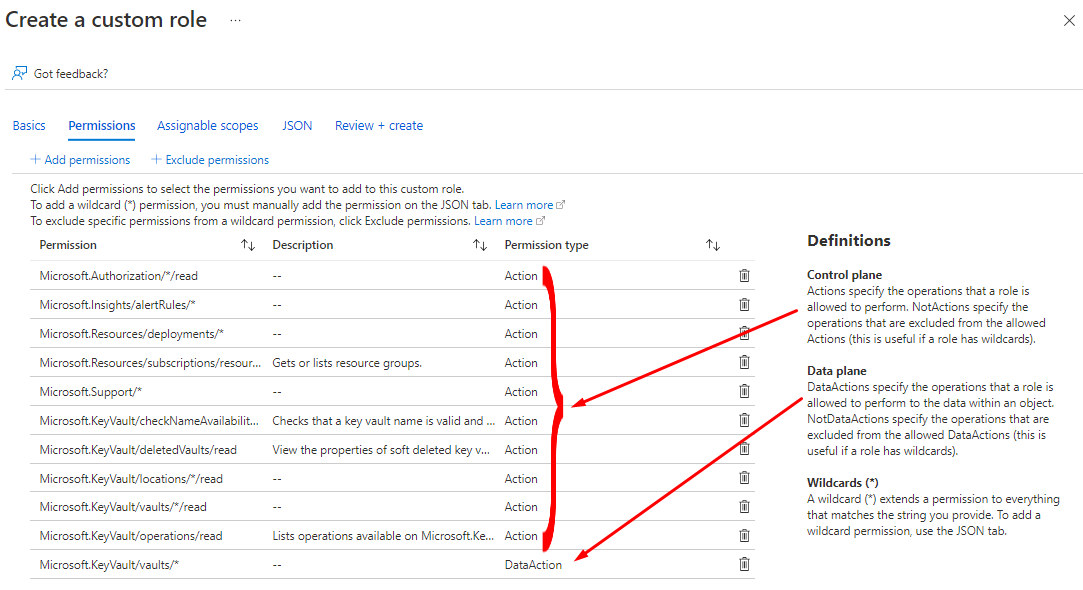
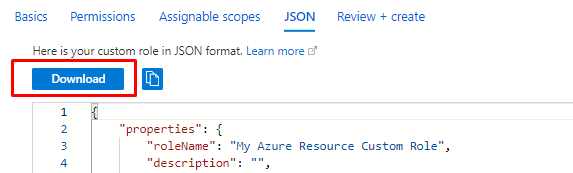
In the JSON you can download the content and use it for a new role or go next next and finish to create and assign the the role.
Or create it with REST API (Postman + Bearer token) or with AZ CLI
Create or update Azure custom roles using the REST API - Azure RBAC
If in doubt how to use CLI or Web request (Invoke-WebRequest or Curl) see this post.

Azure CLI: Call Azure REST API Directly | Build5Nines
Use PIM
To reduce the risks of excessive, pointless, or erroneous access permissions to crucial resources, Privileged Identity Management (PIM) offers a time-based and approval-based role activation. Resources from Azure Active Directory (Azure AD), Azure, and other Microsoft Online Services like Microsoft 365 or Microsoft Intune are included in this list.
PIM enables you to allow a specific set of actions at a particular scope. Key features include:
- Provide just-in-time privileged access to resources
- Assign eligibility for membership or ownership of privileged access groups
- Assign time-bound access to resources using start and end dates
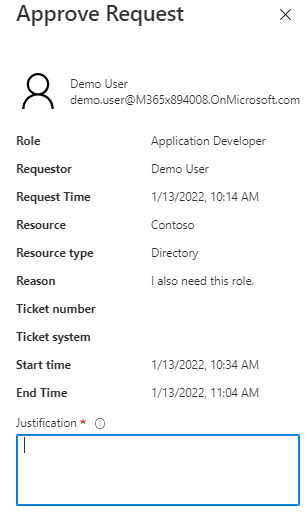
- Require approval to activate privileged roles
- Enforce multifactor authentication to activate any role
- Use justification to understand why users activate
- Get notifications when privileged roles are activated
- Conduct access reviews to ensure users still need roles
- Download audit history for internal or external audit
To use Privileged Identity Management, you must have one of the following licenses:
- Azure AD Premium P2
How to enable?
Couple of months ago I wrote a study series for AZ-500 and during that I that I covered also PIM, see the following post for PIM activation.
Section 2 – Secure access by using Azure AD – How to Configure Azure AD Privileged Identity Management (PIM)
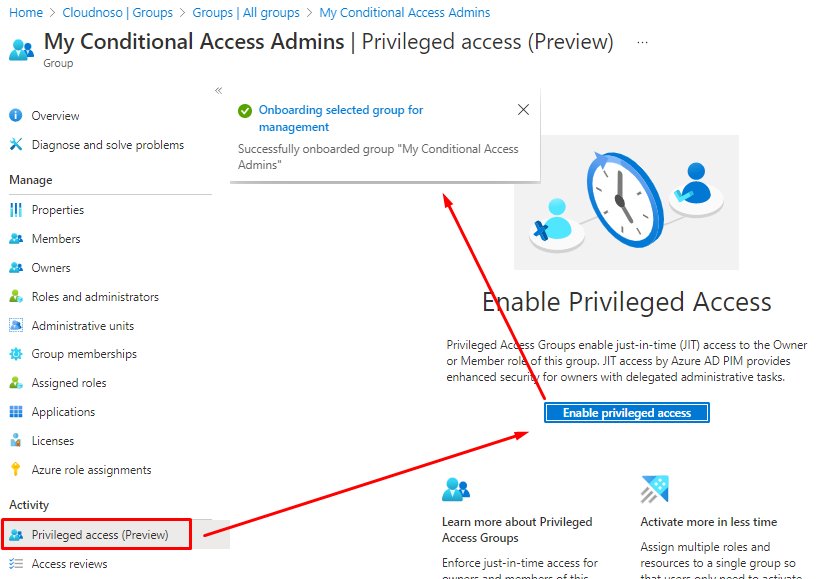
And Privileged Access Groups
But use the Azure AD portal's Roles and Administrators experience rather than the Privileged Access Groups experience to make the user or group eligible for activation into the group if you want to assign a privileged access group to a role for administrative access to Exchange, Security & Compliance Center, or SharePoint.
So, that in mind let's see what it's all about.
You can create different just-in-time policies for each group and will be able to activate several roles at once.
How to enable?
Yeah, sure
And then activate
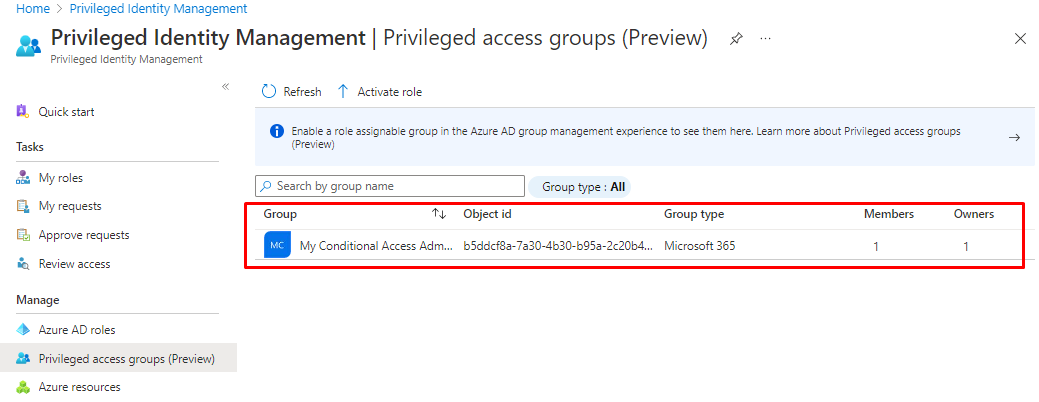
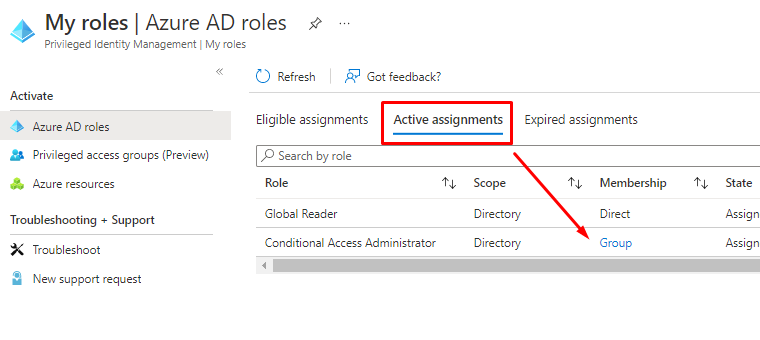
And you can see it under PIM control plane.
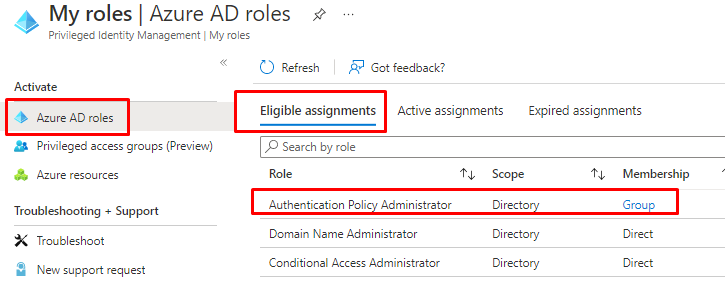
And we can mix Activate and Eligible assignments
And the permanently active
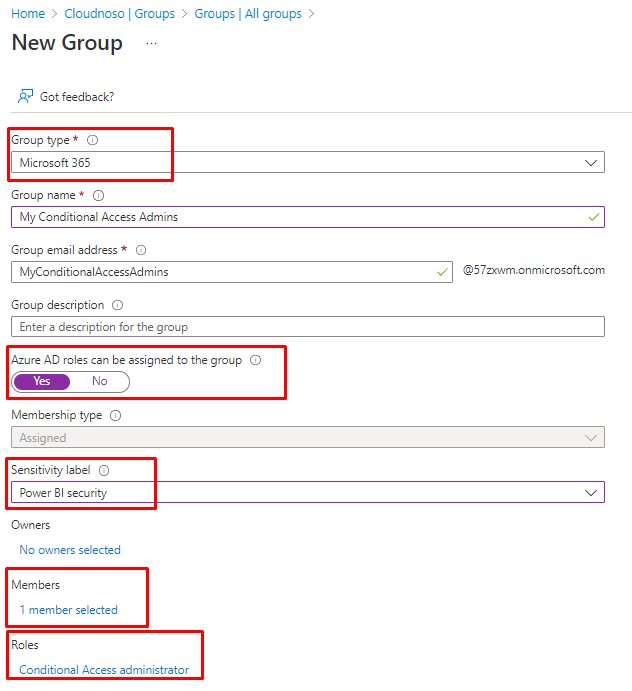
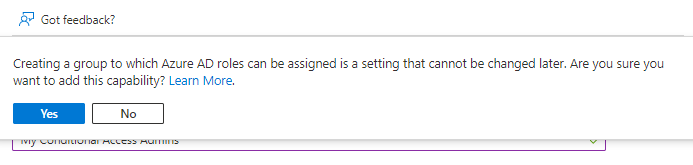
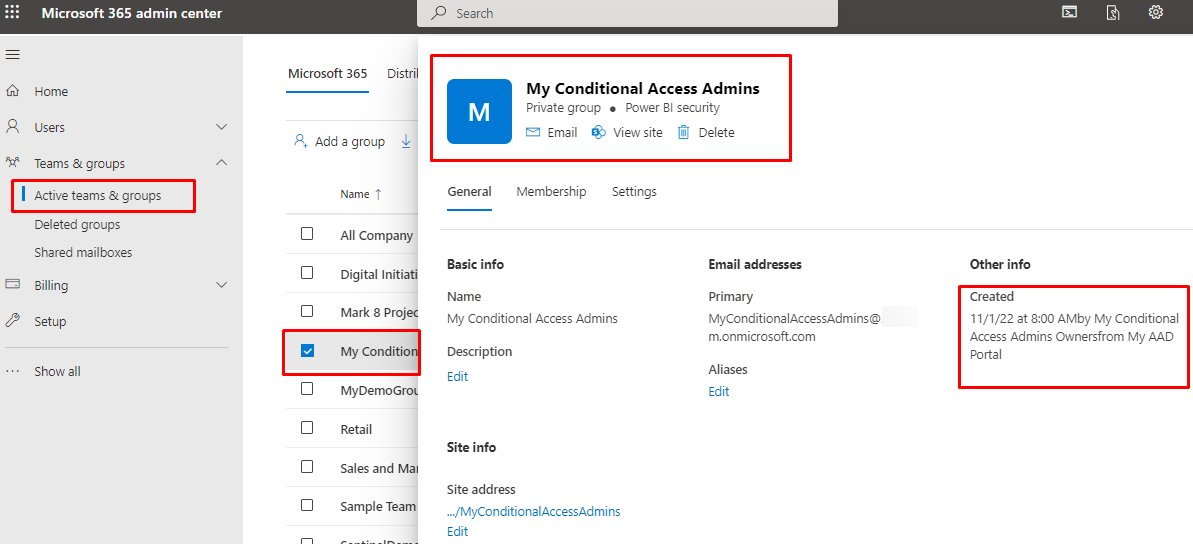
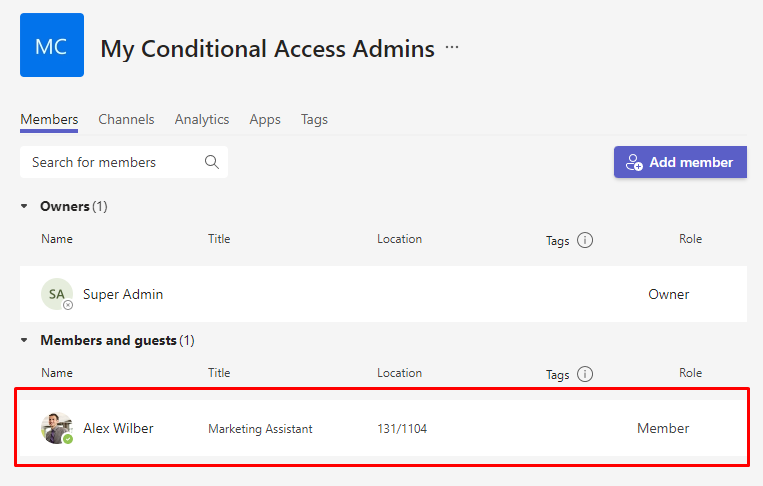
Make it a M365 group
We chose to create an M365 group in the beginning and it will show inside Microsoft 365 Admin center also.
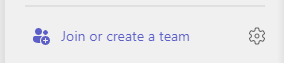
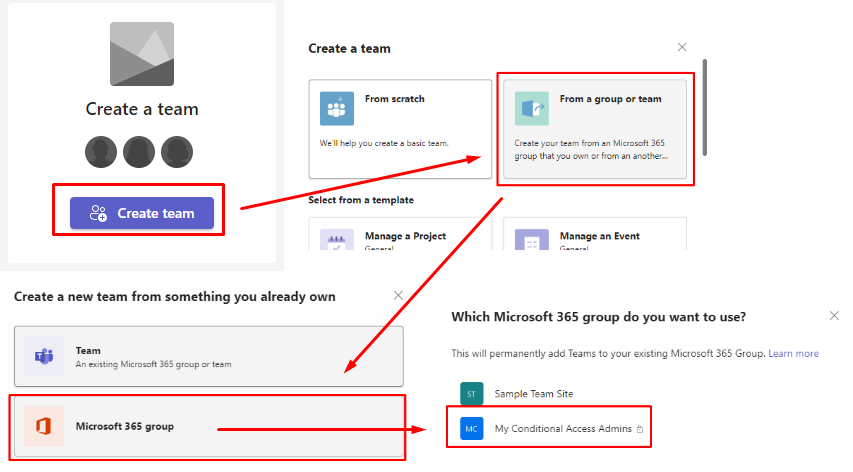
So, let's see can we Teamify this group?
The options
We have at least three options here, use Microsoft Graph, PnP-PowerShell modules or create a new Teams as the owner of the group (the Approval all mighty)
From Teams
You can enable the group from Teams directly as the Owner of the group.
Once the group member will login to Teams they will see the new Team
Graph
You can also do it with Graph if you want. And the same requirements apply.
In order to create a team, the group must have a least one owner.
Due to replication delays, if the group was created less than 15 minutes ago, the Create team request could fail with a 404 error code. With a 10-second gap between calls, the suggested practice is to retry the Create team call three times.
Create team from group - Microsoft Graph v1.0
With PnP
With PnP you can do it with PowerShell, you just have to install the modules and follow these instructions.
How to install the modules
Install-Module -Name "PnP.PowerShell"
The modules used
Get-PnPSite | PnP PowerShell
Set-PnPSite | PnP PowerShell

Add M365 Group and Enable Team in SPO Site using PnP PowerShell
Sentinel collaboration in Teams (Public preview)
Did you know that Sentinel already has this feature, you can have all the incident details inside a Teams and once the case is closed, it will be archived and stored for future references or just to keep backlog of the deeds done during the investigation and remediation.
In order to create teams from Microsoft Sentinel:
- The user creating the team must have Incident write permissions in Microsoft Sentinel. For example, the Microsoft Sentinel Responder role is an ideal, minimum role for this privilege.
- The user creating the team must also have permissions to create teams in Microsoft Teams.
- Any Microsoft Sentinel user, including users with the Reader, Responder, or Contributor roles, can gain access to the created team by requesting access.
Collaborate in Microsoft Teams with a Microsoft Sentinel incident team
Closure
In this part we discovered how we can protect the high-privileged user and roles with PIM and how to activate multiple roles inside a Access group but also how to collaborate with the users having the role.
Automating the process of giving permissions and removing the accordingly is an important part of keeping your environments safe of harms way.
In the next part more Identity do's and don'ts, Stay tuned!
Hackers don’t break in – they log in.
